前言
本文介绍使用Docker+Nginx+Jenkins将Hexo博客部署至云服务器。
hexo博客提交云服务器流程:
- 本地电脑Hexo三连,或者Githubaction三连部署到Github。
- Jenkins监测到github项目主页更新,拉取更新后的文件到VPS的Jenkins工作目录。Jenkins(概念篇):Jenkins 简介_ron jenkins 什么意思
- 把Jenkins的工作目录映射到Nginx站点目录
开始之前确保以下几个条件:
1
| sudo apt-get install git
|
安装Jenkins和Nginx
1
2
3
4
5
| cd /root/data/docker_data/jenkins
touch docker-compose.yml
mkdir -p jenkins_home nginx/{html/hexo,conf.d,logs,cache}
touch nginx/nginx.conf
touch nginx/conf.d/hexo.conf
|
文件结构
1
2
3
4
5
6
7
8
9
10
11
12
13
14
15
16
17
| ├── docker-compose.yml
├── jenkins_home
│ ├── com.cloudbees.hudson.plugins.folder.config.AbstractFolderConfiguration.xml
│ ├── config.xml
│ ├── copy_reference_file.log
│ ├── credentials.xml
│ ├── fingerprints
│ ├── github-plugin-configuration.xml
│ ├── hudson.model.UpdateCenter.xml
│ ├── hudson.plugins.build_timeout.global.GlobalTimeOutConfiguration.xml
│ ├── hudson.plugins.build_timeout.operations.BuildStepOperation.xml
└── nginx
├── cache
├── conf.d
├── html
├── logs
└── nginx.conf
|
1
2
3
4
5
6
7
8
9
10
11
12
13
14
15
16
17
18
19
20
21
22
23
24
25
26
| version: '3'
services:
docker_jenkins:
user: root
restart: always
image: jenkins/jenkins:lts
container_name: jenkins
ports:
- 8888:8080
volumes:
- ./jenkins_home/:/var/jenkins_home
- ./nginx/html/hexo:/var/jenkins_home/workspace/blog
docker_nginx_dev:
restart: always
image: nginx
container_name: nginx_dev
ports:
- 8871:8001
volumes:
- ./nginx/nginx.conf:/etc/nginx/nginx.conf
- ./nginx/conf.d:/etc/nginx/conf.d
- .nginx/html:/usr/share/nginx/html
- ./nginx/logs:/var/log/nginx
- ./nginx/cache:/var/cache/nginx
|
1
2
3
4
5
6
7
8
9
10
11
12
13
14
15
16
17
18
19
20
21
22
23
24
25
26
27
| user nginx;
worker_processes 1;
error_log /var/log/nginx/error.log warn;
pid /var/run/nginx.pid;
events {
worker_connections 1024;
}
http {
include /etc/nginx/mime.types;
default_type application/octet-stream;
log_format main '$remote_addr - $remote_user [$time_local] "$request" '
'$status $body_bytes_sent "$http_referer" '
'"$http_user_agent" "$http_x_forwarded_for"';
access_log /var/log/nginx/access.log main;
sendfile on;
keepalive_timeout 65;
gzip on;
include /etc/nginx/conf.d/*.conf;
}
|
1
2
3
4
5
6
7
8
9
10
| server {
listen 8001;
server_name localhost;
location / {
root /usr/share/nginx/html/hexo;
index index.html;
try_files $uri $uri/ /index.html;
}
}
|
在nginx/html/hexo目录下新建index.html,文件内容如下
1
2
3
4
5
6
7
8
9
10
11
| <!DOCTYPE html>
<html lang="en">
<head>
<meta charset="UTF-8">
<meta name="viewport" content="width=device-width, initial-scale=1.0">
<title>Document</title>
</head>
<body>
<h1>welcome to Nginx</h1>
</body>
</html>
|

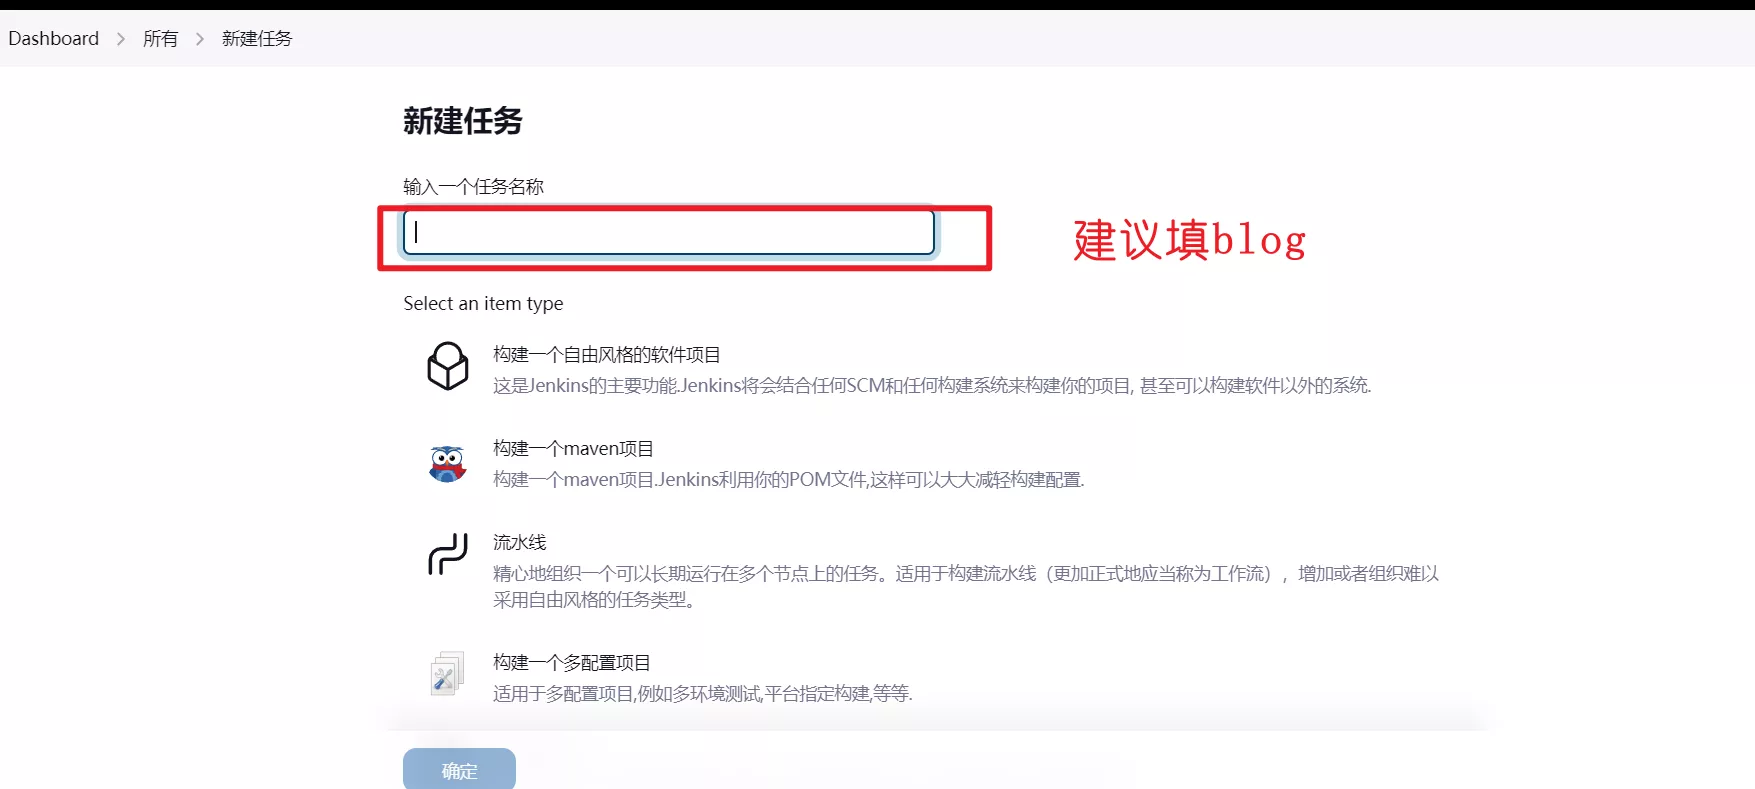
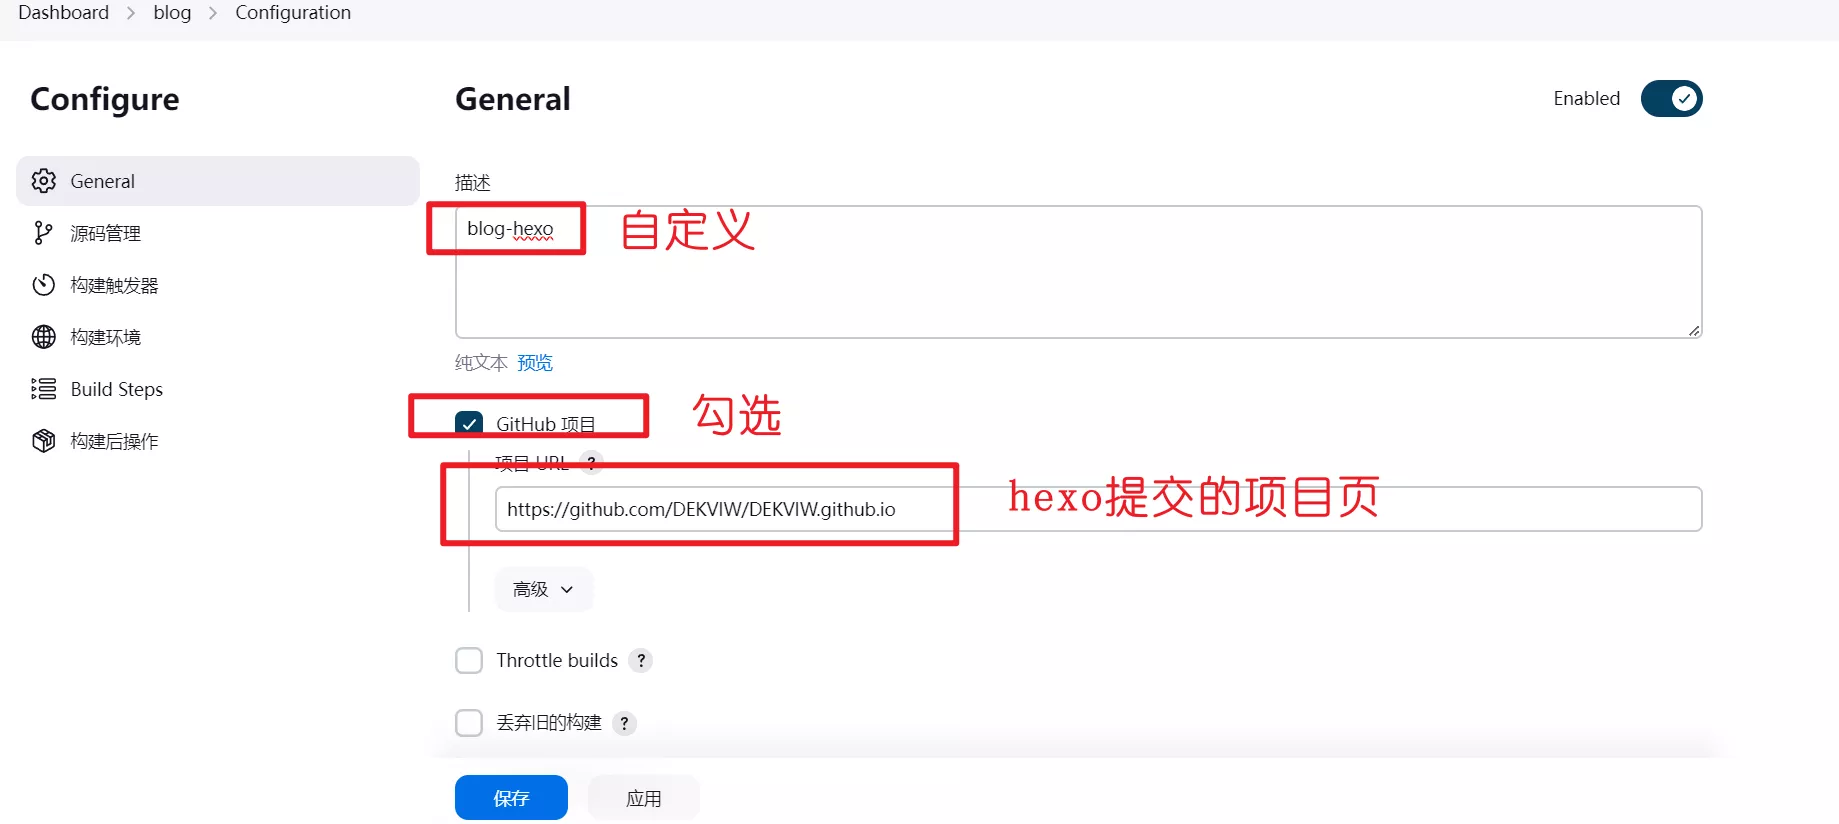
配置Jenkins
根据提示到jenkins_home目录找管理员密码来登陆
后面的安装和配置建议看从零开始搭建JENKINS+GITHUB持续集成环境
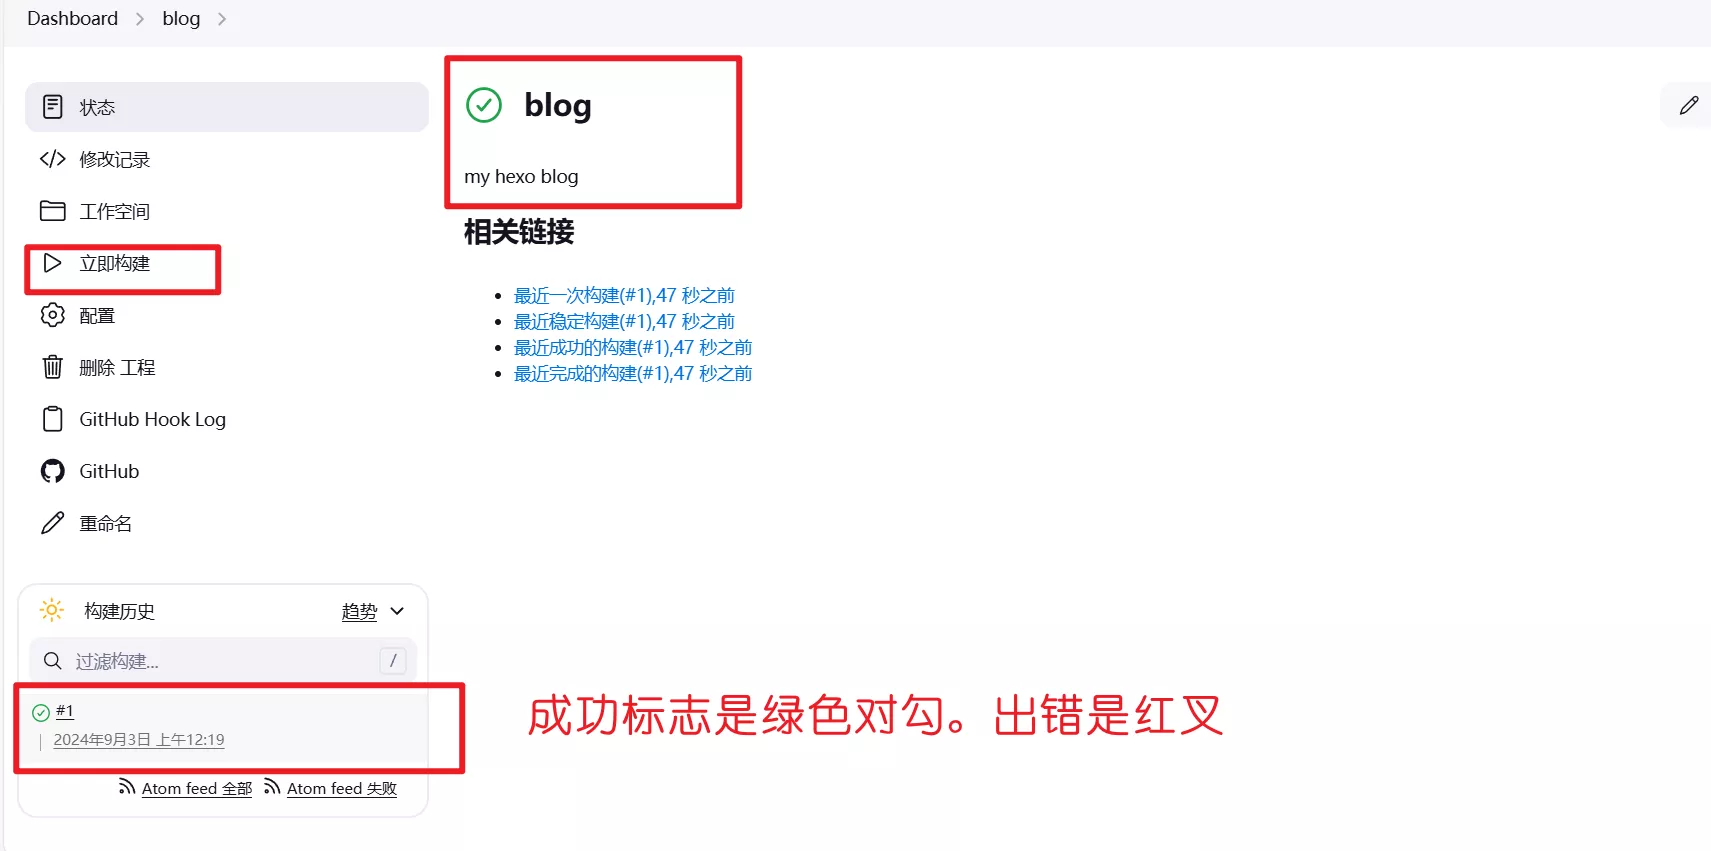
这篇文章看Jenkins的使用到验证构建。主要步骤看建议的文章,下面列出有出入的地方
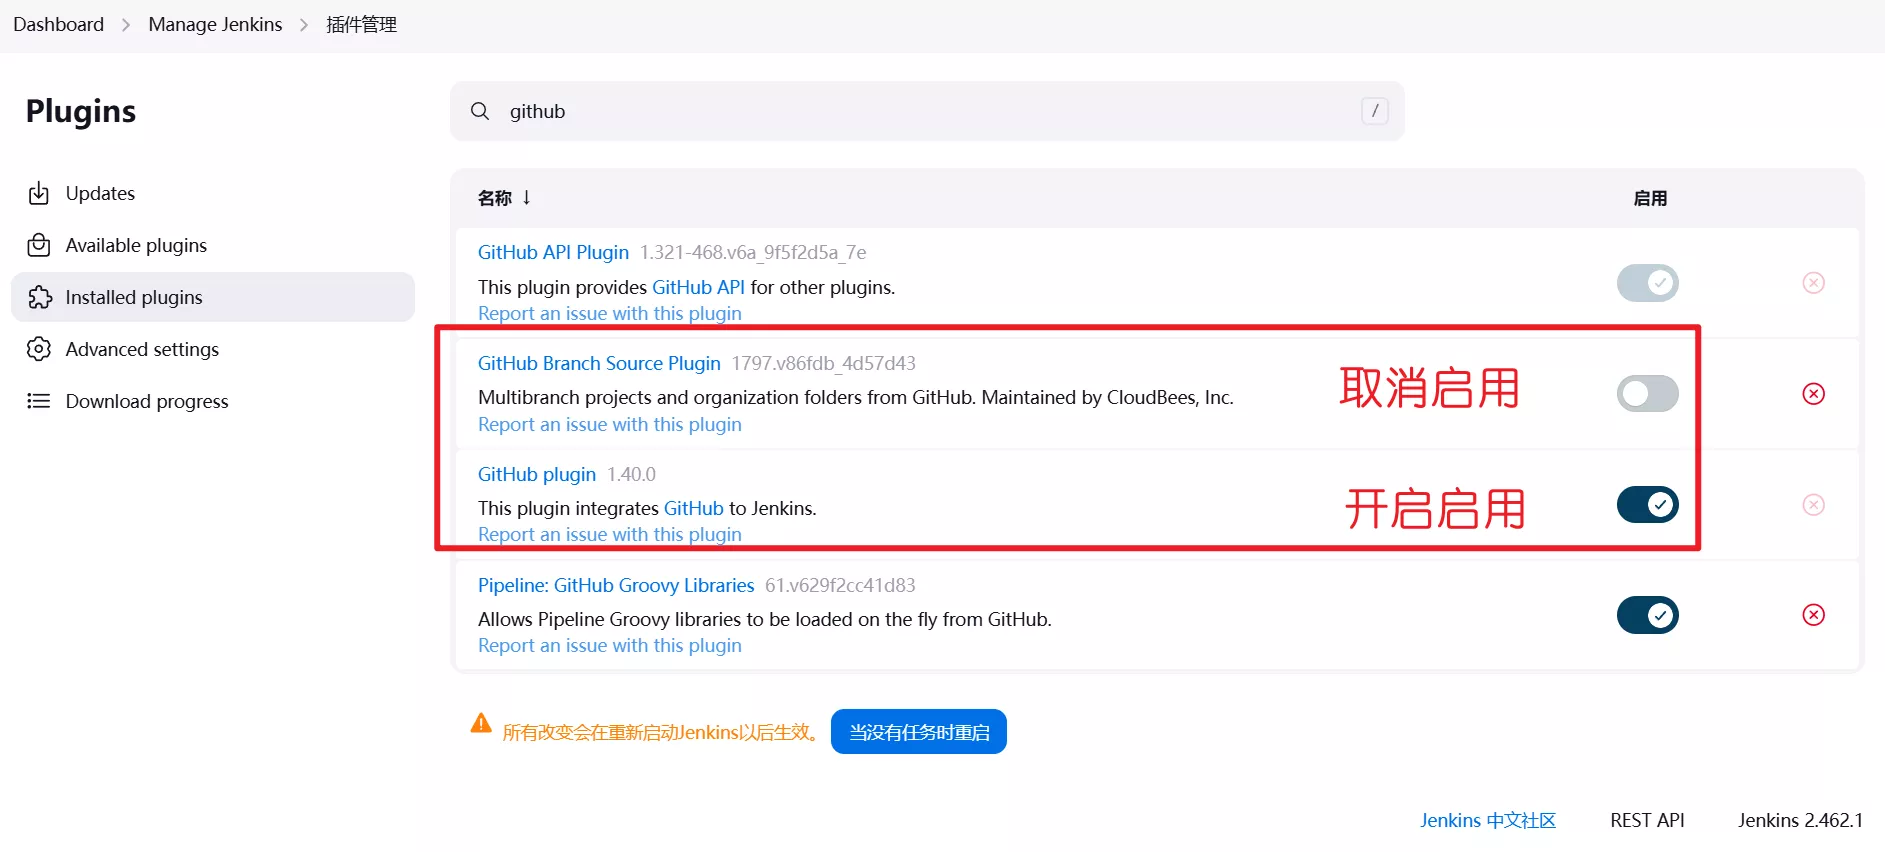
- 启用github插件,github plugin虽然默认安装了,但是并没有启用。需要取消启用github-branch这个插件,再开启github plugin。这两个插件只能启用一个,所以需要取消一个。
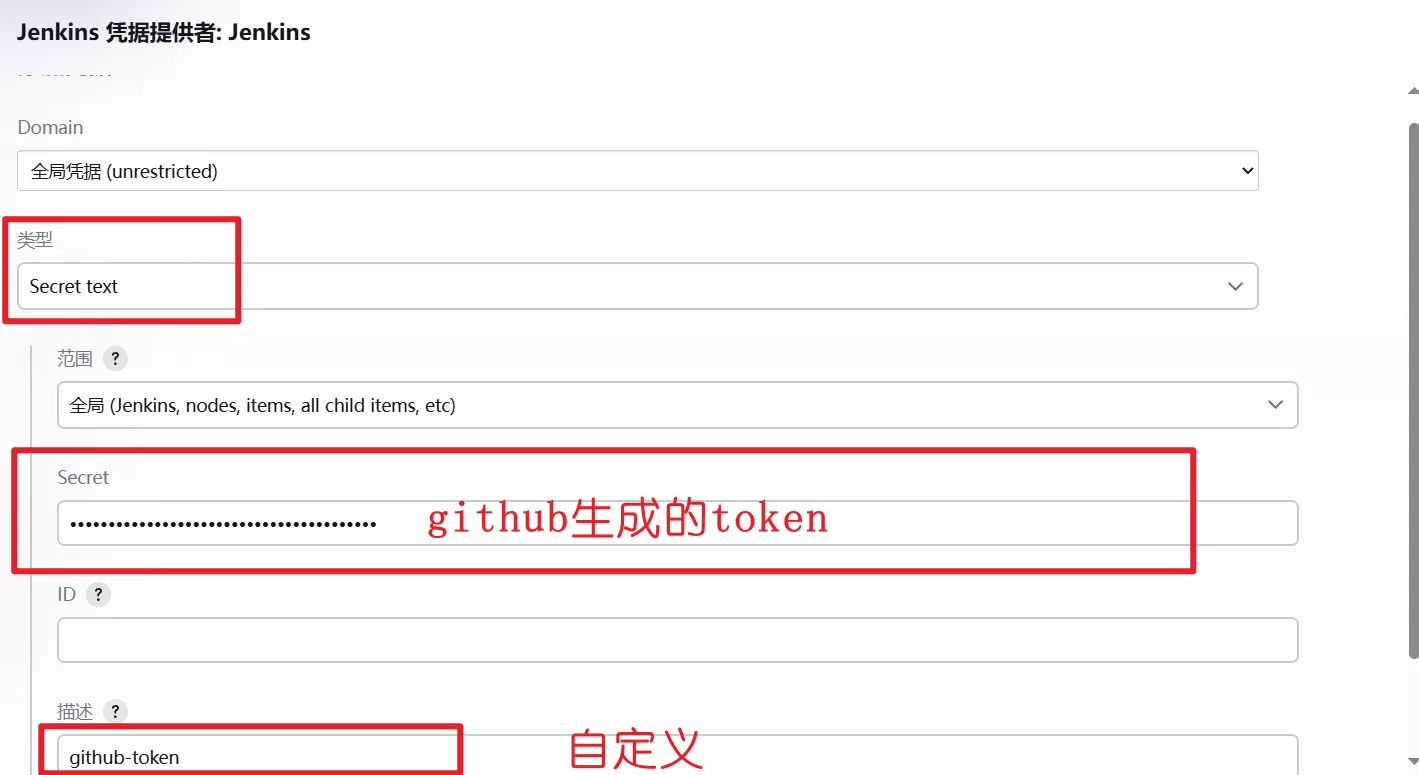
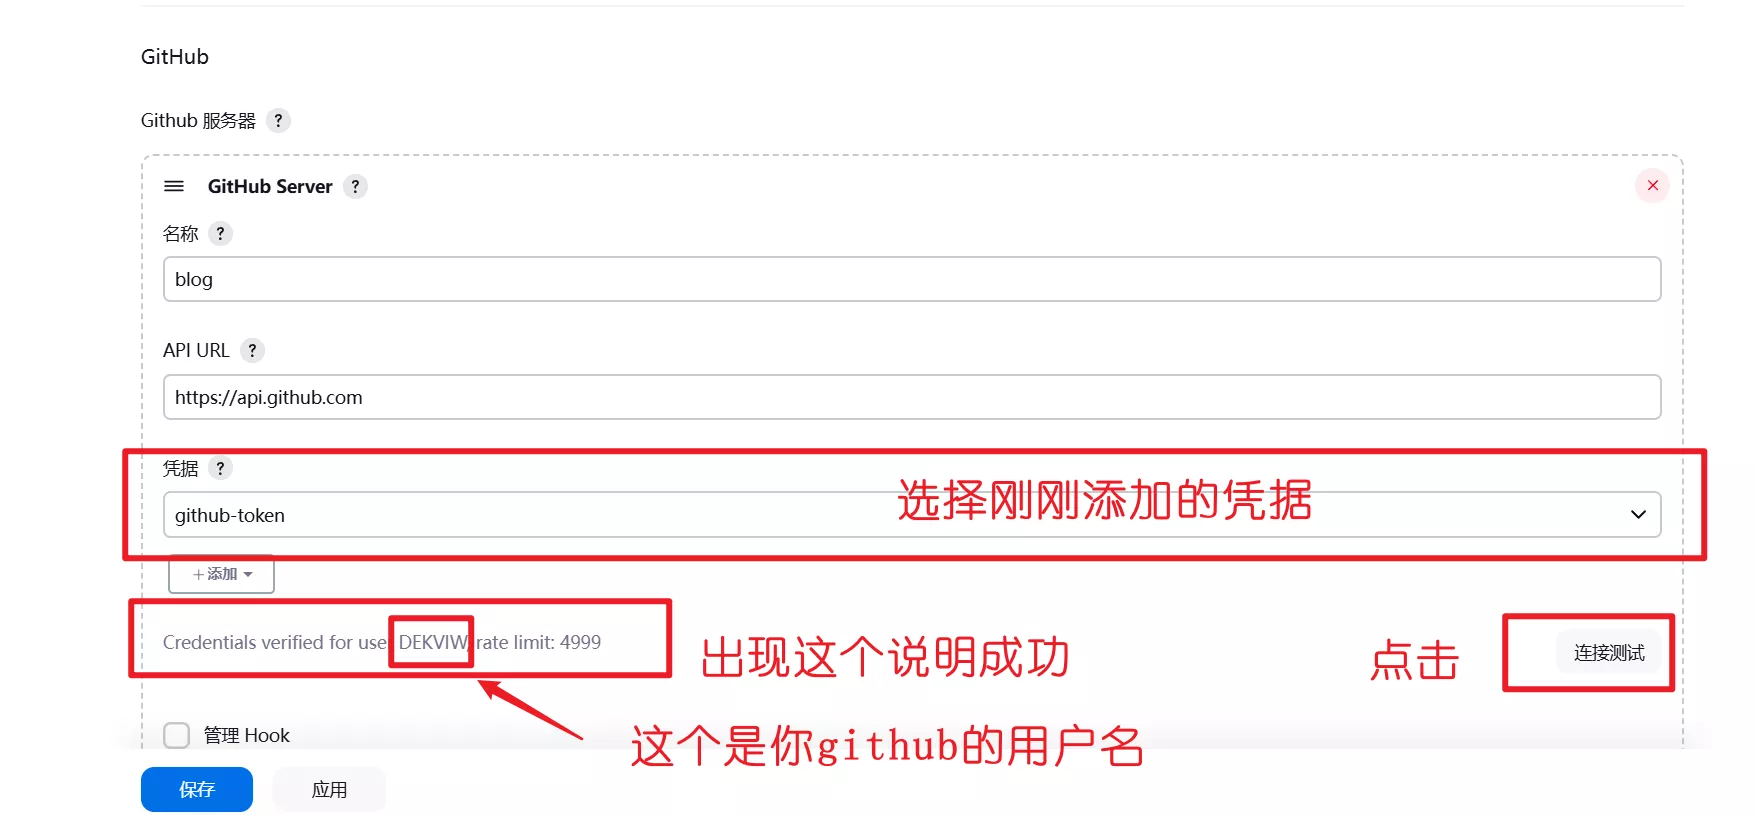
后续配置看从零开始搭建JENKINS+GITHUB持续集成环境
版本原因会有所不同,但大致意思是能看出的
参考资料
从零开始搭建JENKINS+GITHUB持续集成环境
Docker Compose安装部署Jenkins
Jenkins修改显示语言为中文显示(亲测有效)_jenkins 中文-CSDN博客
Jenkins配置任务时无 send files execute commands over SSH
Docker + Jenkins + Nginx实现前端自动化部署