前言
传统方式(麻烦):
- 写完文章 → 本地执行
hexo clean && hexo g && hexo d → 等待几分钟甚至更久 → 博客上线
- 随着文章增多,每次部署时间越来越长,只能干等着
自动化方式(轻松):
- 你写完文章 →
git add . && git commit -m "新文章" && git push → 秒传完成,博客自动上线
把这个过程比作外卖配送:
- 你的本地电脑 = 你的家(写文章的地方)
- 普通私有仓库 = 外卖平台(存储你的原始内容)
- Page Repository = 餐厅(用户访问的网站)
- GitHub Actions = 配送员(自动化工具)
效率提升:
- 本地只需要 git 操作(几秒钟)
- 服务器上的 GitHub Actions 有更强的计算能力
- 你可以立即去做其他事,不用等待部署完成
增量优化:
- GitHub Actions 会智能地只处理变更的部分
- 避免了每次都重新生成所有文件的浪费
简单说,就是把原来需要你手动做的重复劳动,交给了 GitHub 的机器人自动完成,而你只需要专注于写作本身。
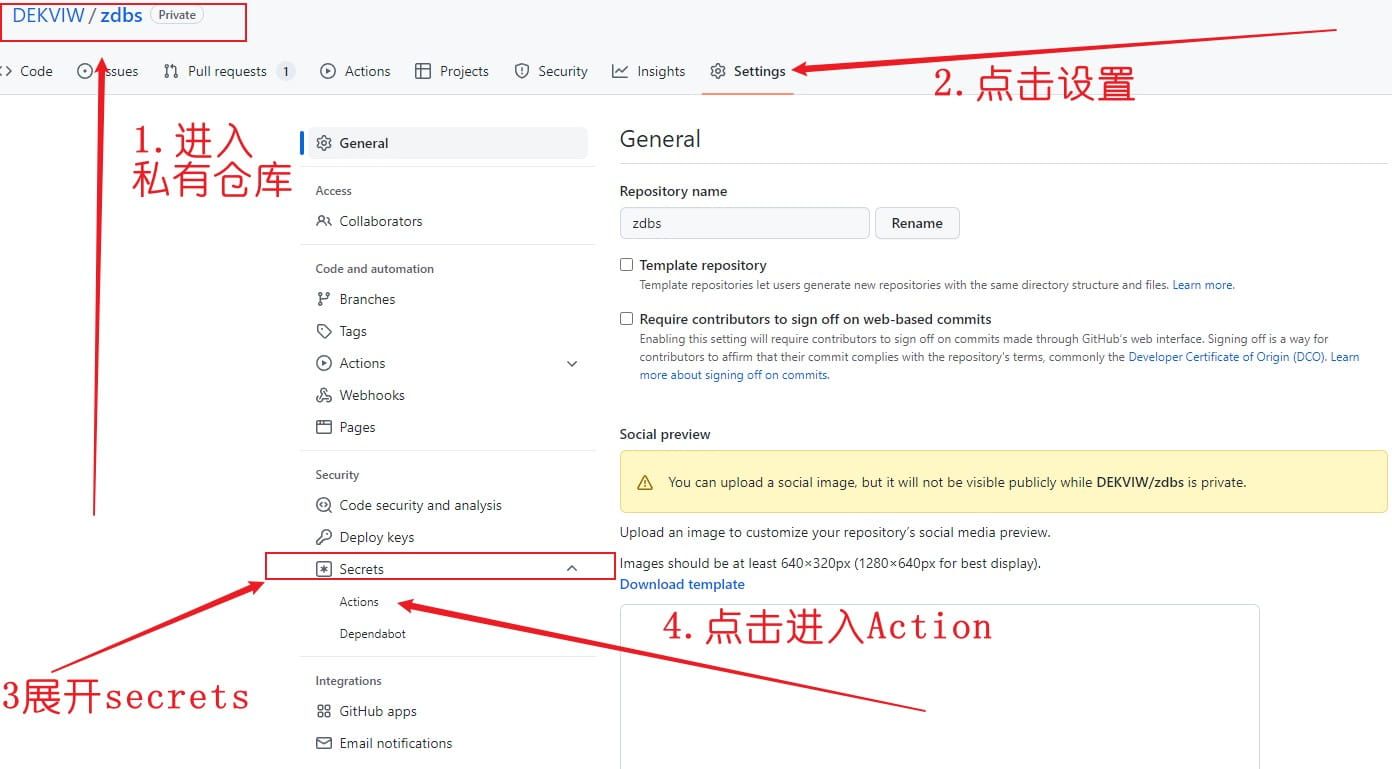
账号与私有仓库
获取账号token,私钥和共钥,已经有的可以跳过此步
配置教程
私钥:id_rsa,将私钥配到仓库变量,下面会讲到
公钥:id_rsa.pub,将公钥配置到github账号,上述链接有说
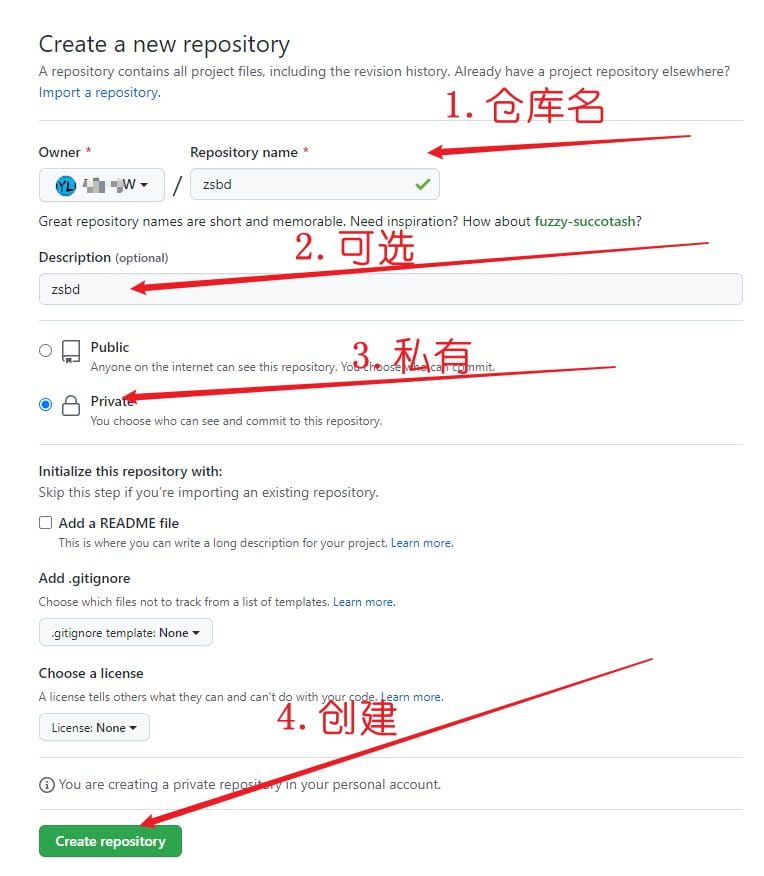
- 登录github账号,新建仓库
- 仓库名,自己随便写,我输的zdbs
- 描述可选,我输zdbs
- 选择私有
- 点击创建

| name |
value |
| GITHUBUSERNAME |
你的github账号用户名 |
| GITHUBEMAIL |
注册github账号的邮箱 |
| GITHUBTOKEN |
之前获取的token令牌 |
| HEXO_DEPLOY_PRI |
之前获取的私钥 |
本地站点根目录
- 在\BlogRoot\.github 文件夹下新建workflows文件夹
- 在workflows文件夹下新建autodeploy.yml文件
- 将以下代码复制到autodeploy.yml
注意,下方代码和原创相比修改了四处,其中三处将master改为main,再有就是将最后几行的其他平台删除,仅保留了github。github平台的,这三处master分支一定改为main分支。
1
2
3
4
5
6
7
8
9
10
11
12
13
14
15
16
17
18
19
20
21
22
23
24
25
26
27
28
29
30
31
32
33
34
35
36
37
38
39
40
41
42
43
44
45
46
47
48
49
50
51
52
53
54
55
56
| name: 自动部署
on:
push:
branches:
- main
release:
types:
- published
jobs:
deploy:
runs-on: ubuntu-latest
steps:
- name: 检查分支
uses: actions/checkout@v2
with:
ref: main
- name: 安装 Node
uses: actions/setup-node@v1
with:
node-version: "12.x"
- name: 安装 Hexo
run: |
export TZ='Asia/Shanghai'
npm install hexo-cli -g
- name: 缓存 Hexo
uses: actions/cache@v1
id: cache
with:
path: node_modules
key: ${{runner.OS}}-${{hashFiles('**/package-lock.json')}}
- name: 安装依赖
if: steps.cache.outputs.cache-hit != 'true'
run: |
npm install --save
- name: 生成静态文件
run: |
hexo clean
hexo generate
- name: 部署
run: |
cd ./public
git init
git config --global user.name '${{ secrets.GITHUBUSERNAME }}'
git config --global user.email '${{ secrets.GITHUBEMAIL }}'
git add .
git commit -m "${{ github.event.head_commit.message }} $(date +"%Z %Y-%m-%d %A %H:%M:%S") Updated By Github Actions"
git push --force --quiet "https://${{ secrets.GITHUBUSERNAME }}:${{ secrets.GITHUBTOKEN }}@github.com/${{ secrets.GITHUBUSERNAME }}/${{ secrets.GITHUBUSERNAME }}.github.io.git" master:main
|
git命令行
进入你的博客根目录,右键gitbash here,把下面代码复制粘贴进去
第二条命令的origin后面输入私有仓库的SSh链接;格式为git@github.com:账号用户名/私有仓库名.git
1
2
3
4
5
6
| git init
git remote add origin
git checkout -b main
git add .
git commit -m "github action update"
git push origin main
|
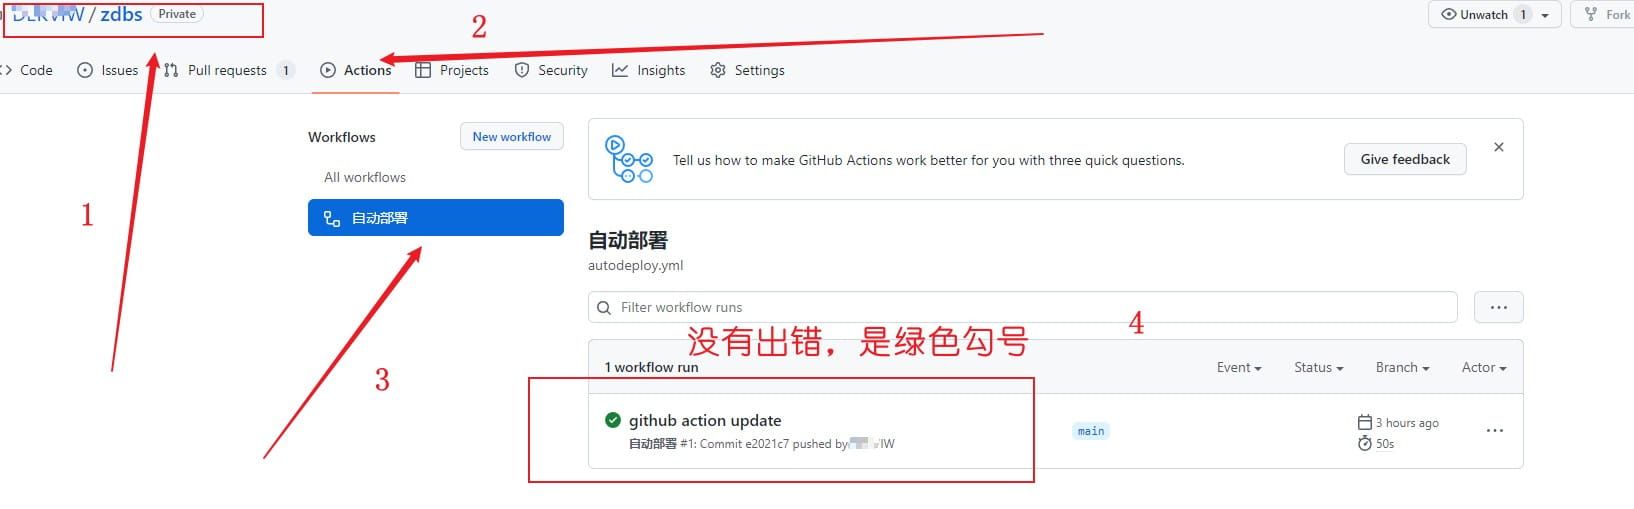
成功标志
参考文章